Import Companies Tool
This section will look at the companies tool which lets users import companies to Dolphin.
In this article:
- Using companies tool
- Using the Software
- Validations
Using the companies tool
- The tool will accept the same API key which is used for the CRM integration.
- The tool will validate the uploaded excel sheet (which is predefined).
- Companies cannot be imported without required data.
- Clicking on “Upload” will populate the company repository from the data in the selected excel sheet.
Using the Software
Step1
Authenticate admin user
- Install the tool by downloading through Dolphin settings page.
- Go to Program Files and choose Company Uploader. You will be taken to a 4 step wizard.
- You will need to enter your current CRM key to continue to step 2.
- To get the API key:
- Login as admin user to your Dolphin 365 account.
- Go to Settings area.
- Navigate to Integration section and click CRM Integration Settings and under CRM Integration section find your API key and copy it.
Step 2
Browse data
- Get the latest excel template from the server.
- Click on Download button.
- Choose a folder and type a file name (i.e. Companies.xlsx).
- Click Save.
- Open the downloaded excel template.
Data requirements are as follows
- Name: Mandatory, Maximum character length is 250
- Country: Mandatory, Value from country list
- State: Mandatory, Value from state list
- City: Mandatory, Maximum character length is 100
- Address line 1: Mandatory
- Address Line 2: Not Mandatory
- Postal Code: Mandatory, Maximum character length is 50
- Industry: Not Mandatory, Maximum character length is 100
- Contact Name: Not Mandatory, Maximum character length is 100
- Contact Number: Not Mandatory, Maximum character length is 30
- Email: Not Mandatory, Maximum character length is 100
- Fax: Not Mandatory, Maximum character length is 30
- Job title: Not Mandatory, Maximum character length is 30
- Description: Not Mandatory
- To open the excel file data click on Browse button.
- Choose the excel sheet and click Open.
- If your data is valid then the tool will read it and populate the grid as per the data entered.
- Click on Next.
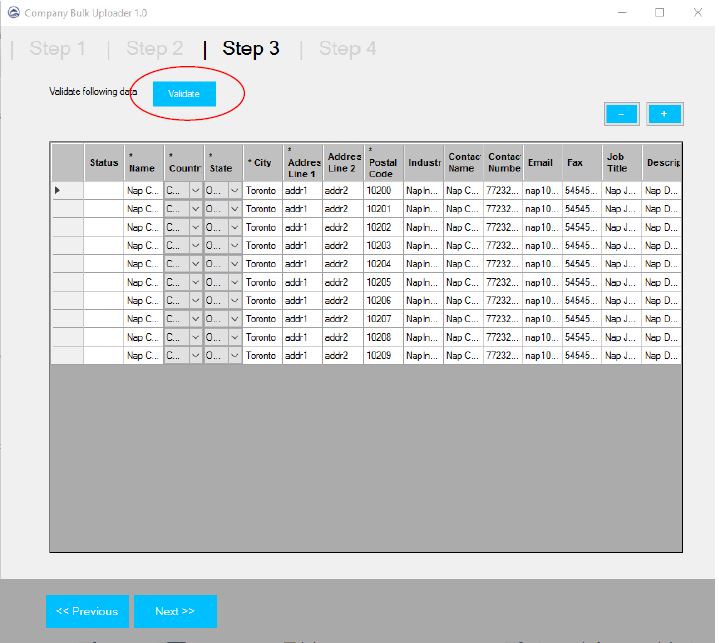
Step 3
Validate data
- In step 3 you can check the validity of your data.
- To proceed further from step 3, you have to validate your data. To check your data is valid click Validate.
- Validity of your data is shown in Status column and if your data is valid you will see success in green if it is not valid you will see a proper error message in red.
- You can do any inline changes like add, edit or remove to the entries in this grid. When all the entries are success you will get a message saying Valid data found. Then you can continue to next step.
Step 4
Upload Data
- Click upload to start uploading your data to server.
- Uploading process may take from seconds to hours based on the amount of your data and if it takes more time the network will give a Time out error and the error will be displayed on the top of the grid. But note that still your data uploading may continue.
- You can check the status of your data anytime by clicking check status button.
Validations
- Companies with existing Company Name in the app cannot be imported.
- Companies with same Company Name on the excel sheet cannot be imported (trim and check duplicate values).
- Companies cannot be imported without required data.
- The tool will show any exception that occur after the upload.
- Special character validation same as the app.
See Also:
- Contract Audit
- Contract Type